
TL;DR

Get audio and creator gear delivered free with Prime
- Fast, free delivery on millions of items
- Prime Video, Amazon Music and more included
- Member-only deals all year
Wireless mic interference often shows as dropouts or noise. Troubleshooting involves checking RF strength, scanning frequencies, optimizing antenna placement, and controlling nearby electronics for a reliable signal.
Imagine you’re in the middle of a live event, and suddenly your wireless microphone starts cutting out. Frustrating, right? Most interference issues are fixable with a little troubleshooting. This guide walks you through practical steps to identify what’s causing those annoying dropouts, bursts of noise, or distorted audio—and how to fix them fast.
Whether you’re setting up in a busy venue or just trying to get a stable signal in a tricky environment, understanding the common interference sources and solutions can save your event—and your sanity. Let’s get your wireless system performing reliably, so you can focus on the show.
Always perform a fresh spectrum scan at the event venue, with all gear operational, to identify real-time interference sources.
Proper antenna placement—elevated, separated, and outside metal structures—is often the quickest fix for dropouts.
Coordinate all wireless channels simultaneously with software or manufacturer tools to prevent intermodulation issues.
Maintain good RF hygiene: reduce electronic noise, check batteries, and verify frequency legality before the event.
A walk test and careful squelch adjustment can reveal hidden dead spots and ensure stable, interference-free audio.
How to troubleshoot common wireless microphone interference issues
Dropouts, bursts of noise and distorted audio rarely require guesswork. Read the receiver, scan the real venue, coordinate every channel and rebuild the RF path from transmitter to antenna.
Watch RF and audio together
The two meters reveal whether the fault begins in the air or farther down the audio chain.
Scan with the venue powered
Lighting, video, networks and nearby systems must be active for a useful spectrum picture.
Coordinate the whole system
Individually clear channels can still create intermodulation when operated together.
Is it really RF interference?
Observe the receiver at the exact moment of failure. Meter behavior directs you toward coverage, outside interference or the audio signal chain.
Investigate the RF path
Likely causes: distance, blocked line of sight, antenna trouble, multipath, a dead spot or external interference.
Inspect the audio chain
Check: batteries, transmitter gain, mute state, squelch, connectors, receiver output, cables and mixer input.
Another signal is present
Meaning: a device is occupying the tuned frequency. Rescan, identify a clean channel and coordinate again.
Scan first. Coordinate second.
A clear frequency is only the beginning. Every wireless device must be evaluated as one interacting RF system.
Lighting, video, Wi-Fi and production gear
Measure the actual venue spectrum
Choose low-noise frequency regions
Calculate all channels simultaneously
Rescan if the RF environment changes
Key insight: many interference complaints begin with ordinary setup conditions. Antenna placement, powered electronics, channel coordination and venue geometry often matter more than replacing the microphone system.
Match the symptom to the fix
Use evidence from the meters, spectrum scan and physical environment. Avoid changing several variables at once.
| Observation | Most likely direction | First action | Avoid |
|---|---|---|---|
| RF disappears in one location | ✓Dead spot, obstruction or multipath | Move or elevate antennas; repeat a walk test | ✗Raising audio gain |
| RF noise with transmitter off | ✓Frequency already occupied | Run a fresh scan and select a coordinated channel | ✗Forcing squelch excessively high |
| Strong RF, distorted audio | ~Gain, battery, cable or mixer issue | Trace the audio chain from transmitter onward | ✗Changing frequency first |
| Several systems fail together | ✓Intermodulation or distribution fault | Coordinate all channels and inspect antenna distribution | ✗Mixing unverified preset groups |
| Range drops after the room fills | ✓Audience absorption or blocked line of sight | Place antennas above the crowd and closer to stage | ✗Leaving antennas inside a rack |
Think in usable spectrum, not even spacing
Choose frequencies in the quietest measured regions, then verify that the complete channel set is compatible.
Nearby noise-source priority
Inspect devices closest to receivers, antennas and unshielded signal paths first.
Qualitative inspection order · proximity and shielding determine actual risk
Build a clean RF path
Good placement, correct distribution and a deliberate validation routine turn a temporary fix into a reliable show setup.
Protect line of sight
- Elevate antennas above the audience.
- Keep antennas outside closed metal racks.
- Separate and orient diversity antennas as specified.
- Move receivers or remote antennas closer to the stage.
- Use directional antennas for long, controlled coverage.
Control loss and amplification
- Inspect coax for loose or damaged connectors.
- Verify impedance and antenna frequency range.
- Avoid excessive cable length and passive splitter loss.
- Confirm DC power reaches active antennas.
- Use only the RF gain required to overcome system loss.
Keep every channel compatible
- Include mics, IEMs, intercom and instrument links.
- Use compatible manufacturer groups or coordination software.
- Check nearby venue and broadcast systems.
- Verify current national rules and local TV occupancy.
- Never assume a formerly legal UHF channel remains available.
Test the real performance area
- Install fresh batteries and confirm gain structure.
- Walk every stage, aisle and backstage transition.
- Watch RF diversity indicators while moving.
- Adjust squelch carefully—high settings reduce usable range.
- Monitor the spectrum as other production systems activate.
Is It Really RF Interference? How to Confirm the Problem’s RF or Audio
The first step is to figure out if radio-frequency interference is causing your issues. Look at the receiver’s RF and audio meters during a dropout or noise burst.
If RF drops or disappears but audio stays steady, it’s likely a signal blockage or antenna problem. If RF remains strong but audio distorts or cuts out, check batteries, gain settings, and cables. And if RF activity appears when the transmitter is off, another device might be occupying that frequency.
Understanding what’s happening on these meters is crucial because it guides your troubleshooting approach. For instance, a strong RF signal with poor audio points to issues like faulty cables or gain settings, whereas a weak RF signal with audio dropouts indicates a coverage or interference problem. Recognizing these patterns helps you avoid wasting time on the wrong fixes, ensuring your efforts are targeted and effective.
wireless microphone spectrum analyzer
As an affiliate, we earn on qualifying purchases.
As an affiliate, we earn on qualifying purchases.
How to Scan the Venue for Clear Frequencies Without Missing Hidden Interference
Perform a fresh spectrum scan at the actual venue with all gear turned on—receivers, lighting, video. This captures real interference, unlike scans done elsewhere or beforehand.
Using your receiver’s built-in scanner or compatible software, select frequencies marked as clear. But remember, the goal isn’t just to pick the most evenly spaced channels; it’s about identifying the least congested parts of the spectrum where interference is minimal or absent. Sometimes, interference can be subtle or transient, so performing multiple scans during different times of the event can reveal fluctuating noise sources.
This real-time scan helps you understand the local RF environment, which can be densely populated or unpredictable. Choosing channels with the least noise reduces the chance of dropouts and audio noise, but it’s also vital to consider the potential for interference from other devices that might operate intermittently or at different times. The tradeoff is that a perfect channel now might become congested later, so ongoing monitoring during the event is recommended.
professional wireless microphone antenna
As an affiliate, we earn on qualifying purchases.
As an affiliate, we earn on qualifying purchases.
Coordinating Frequencies: Why Your Channels Might Still Clash
Even if individual channels appear clear, multiple wireless systems can interfere through intermodulation. This happens when RF signals interact inside the hardware, creating new, problematic frequencies that can cause dropouts or noise even on seemingly clear channels.
To prevent this, always use manufacturer-recommended frequency groups or dedicated coordination software. These tools analyze your selected channels and suggest combinations that minimize intermodulation products. Mixing frequencies without verification can lead to unpredictable interference that appears suddenly, especially as multiple systems operate simultaneously in close proximity.
For example, a DJ running three wireless mics and IEMs should coordinate all channels simultaneously to prevent intermod issues that aren’t obvious during initial scans. Proper coordination reduces the risk of complex RF interactions that can be difficult to diagnose later. The tradeoff is that this process might limit your channel options, but it’s a necessary step to ensure reliable operation in challenging environments.
As an affiliate, we earn on qualifying purchases.
Are You Using the Right Frequencies? Check Spectrum Laws and Availability
Frequencies that seem open in your region might be off-limits or shared with other services. Spectrum rules change, especially after TV reallocation in 2017 and beyond.
Always verify local regulations and licensing requirements before operating. Using a licensed frequency without permission can cause interference to licensed users and lead to legal consequences. Additionally, unlicensed bands like 2.4 GHz are crowded and prone to interference, which can compromise your signal reliability.
For instance, a venue in the U.S. should consult the FCC’s current band plans—many traditional UHF channels have been repurposed, pushing users toward digital or 2.4 GHz options. Choosing the right frequency band is a balance between legal compliance, interference minimization, and available spectrum. Ignoring these considerations can result in unstable performance, legal issues, or both, making proper research and adherence to spectrum regulations essential for professional operation.
microphone interference troubleshooting kit
As an affiliate, we earn on qualifying purchases.
As an affiliate, we earn on qualifying purchases.
How to Improve Transmitter-to-Receiver Line of Sight and Signal Quality
Radio signals travel best with a clear line of sight. Obstacles like concrete walls, metal scenery, or even a crowd can absorb or reflect RF energy, causing dropouts and degrading audio quality. These reflections can also create multipath interference, where signals arrive at the receiver out of phase, causing distortion.
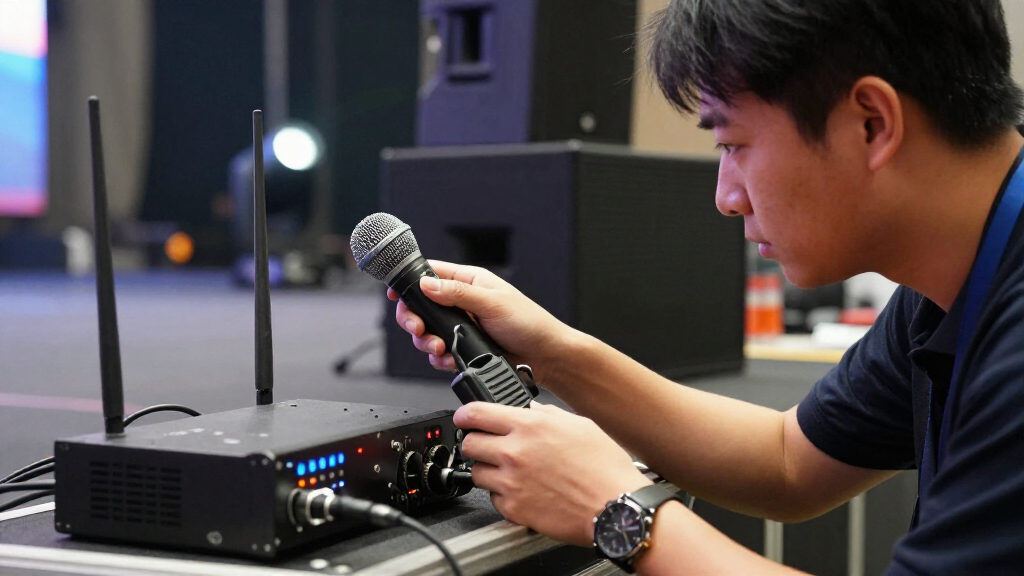
Practical tips include elevating antennas above the audience, moving receivers closer to the stage, and keeping transmitters away from the body or metal objects. For longer distances, directional antennas can focus the RF beam where it’s needed, significantly improving signal strength and stability. Understanding the environment’s impact on RF propagation helps you make informed decisions about placement, reducing the likelihood of interference and dropouts. The tradeoff often involves balancing convenience with optimal positioning; sometimes, a small adjustment in antenna height or orientation can dramatically improve reliability.
Inspect and Adjust Antenna Placement and Distribution to Prevent Dead Spots
Proper antenna setup is critical. Keep diversity antennas separated and oriented per manufacturer specs. Avoid putting antennas inside metal racks or near reflective surfaces, as these can cause signal nulls or multipath issues that lead to dropouts.
If using passive splitters, ensure they match impedance and don’t introduce excessive loss, which can weaken signals. For large venues, employ active antenna-distribution systems, which actively boost and distribute RF signals, maintaining consistent strength across the space. This prevents dead spots where the signal might otherwise fade or be lost entirely.
For instance, a small theater with a single antenna inside a metal lighting truss can experience null spots, especially behind reflective surfaces. Moving the antenna outside or adding a remote booster often provides a more uniform coverage, ensuring all areas receive a strong, stable signal.
Minimize Electronic Noise From Other Devices That Disrupt Your Signal
Common culprits include Wi-Fi, Bluetooth, LED lighting, and digital video equipment. These electronics emit broadband noise that can drown out your wireless signals, especially in crowded RF environments. The interference can cause dropouts, noise bursts, or reduced range, impacting your event’s audio quality.
Keep receivers and antennas away from noisy electronics. For 2.4 GHz systems, reduce Wi-Fi congestion by turning off nearby access points or switching Wi-Fi channels to less congested bands. Using filters or ferrite beads can also help suppress noise from external sources. Recognizing which devices generate interference allows you to implement targeted mitigation strategies, preserving signal integrity. The tradeoff is that in highly electronic environments, complete elimination might be impossible, so proactive placement and filtering are key to maintaining a reliable wireless setup.
Check and Optimize Transmitter Power and Batteries for Reliable Coverage
Use fresh batteries and set transmitter power to the minimum needed for coverage. Excessive power can overload receivers or create intermodulation problems, leading to unpredictable interference patterns. Overpowered transmitters may also cause adjacent channel issues or bleed into other frequencies, reducing overall system reliability.
For instance, a handheld mic with a fresh AA battery and proper gain settings provides a more stable signal than one running on depleted batteries or overdriven input. Balancing power levels conserves battery life and minimizes RF clutter, making the system more predictable. Following manufacturer specs for power output and adjusting as needed ensures optimal performance without risking interference or range issues. The tradeoff involves finding the right balance—too low, and you risk dropouts; too high, and you introduce other interference problems.
Fine-Tune Squelch Settings to Balance Range and Noise Suppression
Squelch mutes the receiver when RF signals fall below a set threshold, preventing audible noise from weak or spurious signals. However, setting it too high can cut off signals prematurely, reducing your effective range. Conversely, setting it too low allows background noise to pass through, compromising audio clarity.
Start with manufacturer recommendations, then walk the venue while adjusting the squelch. Listen for dropouts or noise, and find a setting that suppresses unwanted noise but still maintains reliable coverage. Fine-tuning squelch involves a tradeoff—aiming for the best compromise between maximum range and minimal noise. Proper adjustment ensures consistent audio quality without sacrificing coverage, especially in environments with variable interference levels.
Perform a Walk Test to Find Dead Spots and Confirm Coverage
The best way to catch RF problems is to walk the entire venue with the system active. Monitor RF strength and listen for audio quality in every corner, paying special attention to areas behind obstacles or near reflective surfaces. This real-world testing helps you identify dead zones or areas with weak signals that might not be apparent during static setup.
Test tricky areas like backstage, audience aisles, or behind LED walls. Mark spots where the signal drops or noise appears, then adjust antenna placement or relocate transmitters accordingly. This proactive approach prevents surprises during the event, ensuring consistent coverage and reliable performance. The tradeoff is that thorough walk testing takes time but offers invaluable insight into the actual RF environment, enabling targeted fixes that improve overall system stability.
Frequently Asked Questions
Why does my wireless microphone keep cutting out?
Most dropouts are caused by weak RF signals, blocked line of sight, interference from nearby electronics, or poor antenna placement. Monitoring the RF meter during issues helps pinpoint the cause quickly.How do I find a clear wireless-microphone frequency?
Use your receiver’s scanner or spectrum analysis software on site with all equipment powered. Select channels with the least interference and coordinate with other systems to avoid clashes.Can two wireless microphones use the same frequency?
No. Two transmitters on the same frequency in the same area will interfere, causing dropouts or noise. Always assign unique, coordinated frequencies to each mic.Why does it work during soundcheck but fail when the audience arrives?
Human bodies and additional electronics absorb or block RF signals once people gather. Elevating antennas and repositioning transmitters often restores coverage.Does increasing transmitter power fix interference?
Sometimes, but it can cause overload or intermodulation issues. Focus first on proper antenna placement, frequency coordination, and environment management for best results.Conclusion
Interference might seem complicated, but most issues boil down to simple setup mistakes or environmental factors. A quick spectrum scan, strategic antenna placement, and thorough testing often solve 90% of problems.
Next time your wireless mic falters, remember: your best tool is a systematic approach. With a little patience and attention to detail, you’ll keep the sound clear and your event running smoothly—no surprises.
Halloween Picks
halloween
As an affiliate, we earn on qualifying purchases.