
TL;DR

Get audio and creator gear delivered free — and shop member deals
- Fast, free delivery on millions of items
- Access to Prime Big Deal Days deals on October 6–7
- Prime Video, Amazon Music and more included
Organizing your DJ gear in a trunk is about maximizing space, protecting equipment, and quick access. Using custom foam inserts, labeling, and weight distribution cuts setup time by up to 50%, while smarter storage methods prevent damage.
Use custom foam inserts and modular containers to maximize space and protect fragile gear.
Label everything clearly and organize by setup order to cut setup time in half.
Distribute weight evenly with heavier gear at the bottom to make transport easier and safer.
Secure all gear inside trunks with straps and locks to prevent damage and theft.
Stay updated on modular storage and inventory tools to streamline your workflow.
Organize the trunk. Own the setup.
A reliable DJ trunk is more than packed gear—it is a repeatable operating system. Protect every component, load by weight, arrange by setup order, and make the equipment you need first the easiest to reach.
The goal is not maximum density. The goal is maximum readiness without crushing, shifting, overheating, or hiding essential gear.
Build order into every inch
Treat the trunk like a compact workshop. Every object needs a protected home, a clear label and a position that matches how the show is built.
Stack vertically
Use modular bins, adjustable shelves and fitted foam to capture unused height. Leave enough clearance for shock absorption and airflow.
Fit, pad, isolate
Fragile controllers, mixers and laptops belong in padded cases. Tailored foam prevents movement without applying pressure to knobs or screens.
Keep first-use gear forward
Controller, mixer, interface and primary cable kit should be reachable without unloading backup equipment.
Coil, tie, separate
Figure-eight long cables, secure each coil with reusable straps, and keep cable bags away from screens and controls.
Heavy gear stays low
Place speakers and dense cases at the bottom. Center weight across the trunk and prevent side-to-side shifting.
Lock the outer and inner load
Lock cases, tighten internal straps and check every latch before departure. Security protects against both theft and road shock.
Think in layers, not piles
The safest stack puts mass near the floor while preserving immediate access to the components that begin the setup.
Protect the pressure points
Foam should support the body of the device, not press against faders, knobs, screens or connectors.
Reserve a movement buffer
A tightly packed trunk still needs padding between hard surfaces. Density without cushioning transfers road shock directly into gear.
Keep the center of gravity low
A 50-pound speaker belongs below a 10-pound mixer. Balanced loading protects handles, hinges, the vehicle and the person lifting.
Test the closed trunk
Close, latch and gently rock the case. Movement, rattling or lid pressure means the load needs adjustment.
Match the case to the risk
Protection, weight, flexibility and speed pull in different directions. Use premium protection where failure would stop the show.
| Storage type | Protection | Access | Weight | Best assignment |
|---|---|---|---|---|
| Hard flight caseReinforced corners and locking latches | Controllers, mixers and valuable electronics | |||
| Foam-lined casePrecise shock-absorbing fit | Laptops, interfaces and fragile accessories | |||
| Stackable plastic binLightweight modular storage | Cables, adapters, tools and soft accessories | |||
| Labeled zip pouchFast visual identification | Grouped cable sets and small backup parts |
Selection rule: increase case protection as equipment fragility, value and show-critical importance rise. Use lightweight modules for items that tolerate impact and require frequent access.
End the spaghetti problem
Good cable management protects connectors, prevents accidental pulls and turns connection time into a predictable routine.
The repeatable cable routine
Give every cable the same four-stage treatment after every performance.
Organization impact
Relative operational value of the core trunk practices.
Relative workflow index / Higher values indicate stronger influence on fast identification, safer handling and repeatable setup.
Pack in the order of the show
A visible chain reduces mental load. Label each module, confirm it against inventory, then load it according to when it will leave the trunk.
Inventory
Confirm every show-critical item and backup.
Categorize
Separate audio, power, data and accessories.
Label
Mark contents, cable length and destination.
Load
Last-use gear enters first; first-use gear stays accessible.
Lock
Tighten straps, close latches and secure the trunk.
The 60-second load check
- Heavy equipment is low, centered and restrained.
- Foam protects the chassis without pressing controls.
- Cables are tied, labeled and separated from electronics.
- Primary setup gear is accessible from the opening.
Reset the system immediately
- Return every item to its assigned compartment.
- Flag damaged cables and missing adapters before travel.
- Update an inventory app or checklist for replaced gear.
- Review the layout whenever the equipment list changes.
Safe out.
The best trunk layout is repeatable under pressure. Fit the gear, protect its weak points, make the setup sequence visible, and secure the entire load. The result is less searching, less damage and a smoother start to every performance.
How to Maximize Space in Your DJ Trunk Without Crushing Your Gear
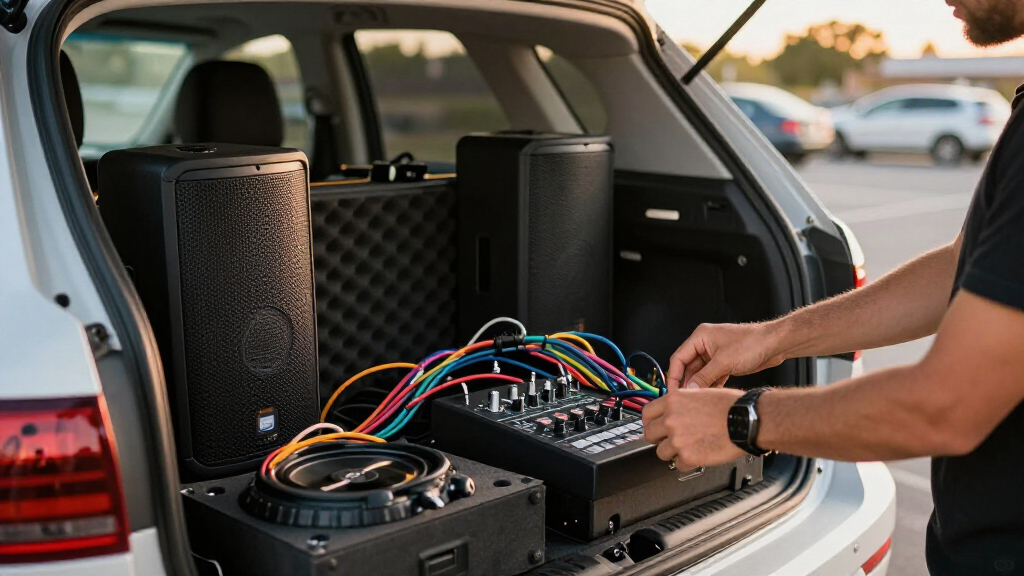
Space is gold in a mobile DJ setup. The trick is stacking smart and using every inch. Custom foam inserts, stackable containers, and adjustable shelving turn a cramped trunk into an organized workshop. For example, a typical 36″ DJ trunk can fit a 15″ controller, two speakers, and all cables if you stack vertically and use modular storage.
Prioritize accessibility for your most-used gear. Place your mixer and main controller at the top or front, so you don’t have to dig through layers every time. Think in layers: heavier gear at the bottom, lighter items on top. This keeps your setup balanced and reduces the risk of damage during transit.
Maximizing space isn’t just about fitting everything; it’s about doing so in a way that preserves your gear’s integrity. Overpacking can lead to crushing delicate equipment, causing damage that might not be immediately visible but could fail during a gig. The tradeoff is between packing tightly for efficiency and leaving enough room for shock absorption and ventilation. Finding that balance ensures your gear arrives safe, ready to perform, and easily accessible.
custom foam inserts for DJ equipment
As an affiliate, we earn on qualifying purchases.
As an affiliate, we earn on qualifying purchases.
The Best Storage Containers for Protecting Your Gear
Hard flight cases, padded foam-lined containers, and stackable plastic bins are the backbone of safe transport. For instance, a SKB iSeries 3i-2011-7 case (around $200) offers rugged, waterproof protection for controllers and laptops. These are perfect for fragile gear that needs shock absorption.
Use foam inserts tailored for your gear’s dimensions. A 15″ controller with a 4″ depth fits snugly inside a foam-lined case, preventing scratches and shocks. When shopping, look for cases with reinforced corners and locking latches to prevent accidental opening during transit.
Choosing the right storage containers is about more than just protection; it’s about understanding the tradeoffs. Hard cases are durable and provide excellent protection but can be heavy and less flexible for quick access. Foam-lined cases offer superior shock absorption but are more expensive and require precise fitting. Plastic bins are lightweight and versatile but offer less impact resistance. Selecting the appropriate container depends on your specific gear fragility, transportation method, and setup speed requirements. Balancing protection with practicality ensures your gear remains safe without sacrificing ease of access.
modular DJ gear storage containers
As an affiliate, we earn on qualifying purchases.
As an affiliate, we earn on qualifying purchases.
Cable Management Tricks That Keep Tangles Away
Cables are notorious for turning into spaghetti—until you tame them. Use Velcro straps or reusable cable ties to coil each cable neatly. For example, a 25-foot XLR cable can be coiled in a figure-eight pattern and secured with a velcro strap, ready to deploy without knots.
Store cables separately from electronic gear. Use labeled zip bags or dedicated drawers within your trunk. This way, when you need a mic or power cord, it’s right there — not buried under layers of gear.
Proper cable management isn’t just about neatness; it impacts your setup time and equipment longevity. Tangled cables can lead to accidental pulls, disconnects, or damage during transport. Using the right coiling techniques and storage solutions reduces strain on connectors and prevents damage. Labeling cables ensures you quickly identify the right one, saving precious setup time. The tradeoff here is between meticulous organization and quick access—finding a balance means you’re ready to go without delay, and your cables last longer because they aren’t subjected to unnecessary stress.
DJ equipment securing straps and locks
As an affiliate, we earn on qualifying purchases.
As an affiliate, we earn on qualifying purchases.
Organize Gear by Usage and Setup Flow
Knowing what you’ll use first makes setup faster. Place your DJ controller, mixer, and cables where you can grab them easily. Less-frequently used items like spare microphones or extra cables go in the back or bottom of the trunk.
For example, pre-pack your gear in order: first, the controller and sound interface; second, cables for quick connection; last, backup gear. Label each container with its contents to avoid fumbling during setup.
Organizing gear by usage flow isn’t just about convenience; it’s about reducing the mental load during a busy setup. When you arrange items according to the order of use, it minimizes the risk of forgetting critical components or fumbling for the right cable. This systematic approach helps in troubleshooting on the fly and ensures you’re not rushing to find that one piece of gear when the crowd is waiting. The tradeoff involves investing time upfront in packing and labeling but results in a much smoother, faster setup—crucial during tight event schedules.
As an affiliate, we earn on qualifying purchases.
Distribute Weight Evenly to Ease Transport
Heavy gear at the bottom, lighter items on top — that’s the rule. A typical setup might include stacking speakers at the bottom, then placing the controller and accessories on top. This keeps your trunk balanced and reduces strain when lifting.
For example, a 50-pound speaker like the QSC K12.2 should sit at the bottom of your trunk, with a 10-pound mixer and cables above. Use straps or bungee cords to secure everything in place during transit.
Distributing weight evenly isn’t just about making your trunk easier to carry; it also preserves the longevity of your gear and your vehicle. Uneven weight can cause strain on your trunk hinges, handles, and even your back when lifting. Proper weight distribution minimizes these risks, but it requires a thoughtful approach—placing the heaviest items at the bottom and ensuring everything is secured prevents shifting that could cause damage or accidents. The tradeoff is the extra time spent organizing for balance but results in safer, easier transport and less wear and tear over time.
Lock and Secure Your Gear to Prevent Theft and Damage
Lockable cases and trunks protect your gear from theft. Inside, use straps or bungee cords to hold equipment steady. For example, a lockable Pelican case keeps your controller safe, while adjustable straps prevent sliding during transport.
Always tighten straps and double-check before hitting the road. A secure setup means less worry about gear shifting or falling during bumpy rides.
Securing your gear isn’t just about preventing theft; it’s about safeguarding against the physical shocks and jolts that happen during transit. Properly locking cases deters opportunistic theft, especially during overnight gigs or in less secure parking. Using straps or bungee cords inside the trunk ensures that even if the case opens slightly or the vehicle hits a bump, your gear stays put. The tradeoff involves extra time securing everything thoroughly, but it’s a small investment that pays off by preventing costly damages or losses. This disciplined approach ensures your gear arrives intact and ready to perform, giving you peace of mind and a professional edge.
Latest Trends in DJ Gear Storage You Should Know
Modular storage solutions and smart inventory tools are revolutionizing how DJs organize. Modular cases let you customize compartments for different gear sizes. RFID tags and apps like GearTrack help track what’s in your trunk, preventing loss and simplifying setup.
Lightweight, eco-friendly materials like recycled plastics and aluminum are replacing heavier options. These innovations make a significant difference when you’re carrying gear to multiple gigs in a day.
Staying ahead with these trends isn’t just about convenience; it’s about adapting to a faster-paced industry where efficiency matters. Modular storage allows you to tailor your setup to each gig, reducing setup and teardown times. RFID and inventory apps minimize the mental load by providing quick visual confirmation of your gear, preventing forgotten items or last-minute searches. The tradeoff involves initial investment and learning new systems, but the payoff is streamlined workflows and reduced stress, enabling you to focus more on your performance than logistics.
Frequently Asked Questions
What are the best storage containers for DJ equipment?
Hard cases like SKB iSeries, padded foam-lined containers, and stackable plastic bins are top picks. They protect your gear from shocks, water, and dust, making setup and teardown smoother.
How can I prevent cables from tangling?
Coil each cable in a figure-eight pattern, secure with Velcro straps, and store in labeled zip bags. This keeps cables neat, accessible, and damage-free.
What’s the best way to organize gear in a small trunk?
Use vertical stacking, modular compartments, and prioritize essential gear at the front. Label everything clearly to speed up setup on busy nights.
How do I protect fragile equipment during transport?
Use padded cases, foam inserts, and secure gear with straps. Always double-check that everything is snug and locked in place before moving.
Are there tools that help me keep track of my gear?
Yes, inventory apps like GearTrack or custom labeling systems help manage and locate gear easily, reducing loss and setup time.
Conclusion
A tidy, well-thought-out trunk isn’t just about neatness — it’s your secret weapon for quick setup, safe gear, and confident performances. Invest in smart organization now, and every gig becomes smoother. Remember: your gear is your craft — treat it like the precious tool it is, and it will serve you well every time.Fall Picks
fall essentials
As an affiliate, we earn on qualifying purchases.