TL;DR
Open a free Amazon Business account
Business pricing, bulk buying and tax-exempt orders.
Create a free accountAs an affiliate, we earn on qualifying purchases.
Effective teardown and packing involve a systematic approach, safety precautions, and smart organization. Using checklists, labeling, and protective gear helps you finish faster and avoid costly mistakes.
After a high-energy gig, the last thing you want is to be stuck fumbling with tangled cables or risking damage to your gear. A smooth teardown is just as crucial as the setup—it’s what keeps your gear safe, your workflow efficient, and your reputation intact. When you master the art of packing up, you save time, prevent accidents, and get ready faster for the next show.
This guide walks through proven tactics, real-world tips, and simple routines that will turn teardown from a chore into a quick, safe, and organized process. Whether you’re a seasoned pro or just starting out, these best practices can transform your post-gig routine.
Always power down gear properly before starting teardown to prevent damage and injury.
Follow a systematic breakdown order—disconnect cables first, then remove stands, last the controllers—to save time.
Label all cables and gear immediately to simplify reassembly and avoid confusion.
Use padded cases and protective wrapping for fragile equipment to prevent damage during transport.
Leverage tech tools like inventory apps and wireless gear to speed up your teardown routine.
Best Practices for Teardown and Packing After a Gig
A smooth load-out protects your equipment, your crew, and your reputation. The winning routine is simple: power down safely, work in a fixed order, label everything, cushion fragile gear, and finish with a documented sweep.
Follow the same sequence every time
A fixed order cuts decision fatigue and prevents avoidable accidents. Clear cable paths before moving stands or heavy cases, then protect delicate electronics before the venue becomes crowded with outgoing gear.
Power down safely
Mute outputs, shut down components in the correct order, and disconnect mains power.
Disconnect cables
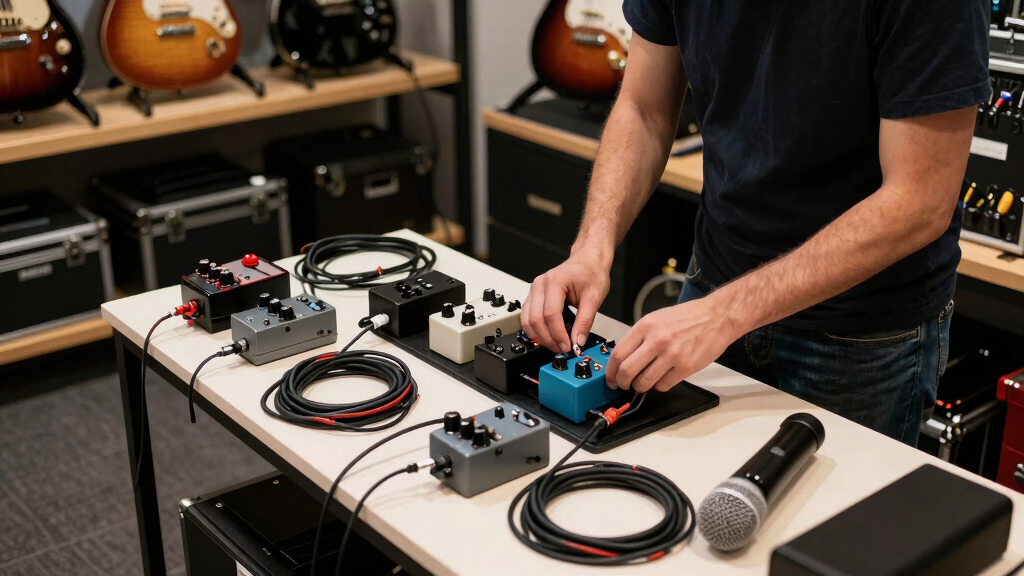
Remove, inspect, over-under coil, strap, and label each cable before it enters a case.
Remove mics and stands
Take off microphones first, then fold stands carefully to protect clips and threads.
Case the controls
Pack mixers and controllers into fitted padding with knobs and ports protected.
Pack and secure
Cushion speakers, stack stable cases, strap the load, and confirm nothing shifts.
Protect people before equipment
Fatigue, low light, time pressure, and blocked walkways make load-out deceptively risky. Slow down for the moments that matter: electrical shutdown, heavy lifting, sharp edges, stairs, and vehicle loading.
Mute, shut down, unplug
Never pull live signal or power cables casually. Correct shutdown helps prevent surges, shorts, speaker pops, and damaged connections.
Legs drive the lift
Keep the case close, brace your core, lift with your legs, and avoid twisting. Use two people, a cart, or a dolly when needed.
Maintain clear lanes
Coil cables immediately, remove debris, communicate movements, and keep exits, stairs, and loading routes unobstructed.
A single powered speaker can be a serious strain risk. Get assistance when the weight, shape, stairs, or fatigue make a solo lift unsafe. An extra minute is cheaper than an injury or a dropped cabinet.
Match protection to vulnerability
Good packing is an investment in equipment life. Choose fitted padding for sensitive electronics, rigid protection for impact-prone gear, and dedicated organizers for components damaged by bending, twisting, or loss.
| Protection method | Impact | Speed | Best use |
|---|---|---|---|
| Fitted flight case | ✓ High | ✓ Fast | Mixers, controllers, rack gear |
| Padded gig bag | ~ Medium | ✓ Fast | Mics, compact stands, accessories |
| Foam insert | ✓ High | ~ Medium | Fragile, custom-shaped components |
| Blanket or bubble wrap | ~ Medium | ~ Medium | Speakers without fitted covers |
| Loose vehicle loading | ✗ Low | ✗ False economy | Never recommended |
Turn every case into a map
Clear labels reduce mental load, wiring mistakes, and low-light confusion. Combine readable names, color families, storage zones, and a simple inventory record so anyone on the crew can rebuild the system accurately.
Label both cable ends
Use the same name or color at each end so the destination remains obvious even when most of the cable is hidden.
Vocal 1 → Input 01Assign a storage home
Create dedicated containers for audio, power, adapters, microphones, clamps, and tools. Return every item to the same zone.
Case C3 / SignalPhotograph and inventory
Capture the setup, note damage immediately, and check items against a digital or printed list before leaving the venue.
Photo + Count + ConditionFrom final note to transport-ready
Leave nothing loose, lost, or undocumented
The last five minutes protect the next show. Clean the work area, scan every corner, verify inventory, photograph anything unusual, and confirm the vehicle load cannot slide, topple, or crush delicate cases.
Start with Safety: Power Down and Protect Yourself
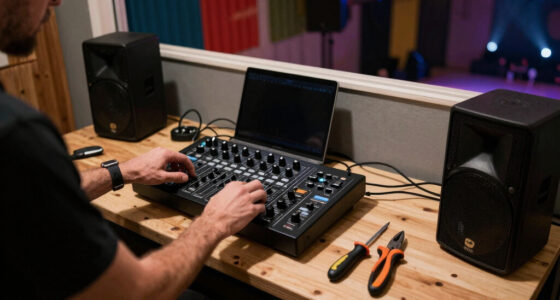
Before touching a single cable or piece of gear, switch off all equipment properly. Power down your mixer, controllers, and speakers. Use the correct procedures to avoid surges or shorts that could damage gear or cause injury.
Handle heavy items with care—use proper lifting techniques or get help. For instance, a 65-pound powered speaker like the QSC K12.2 can cause back strain if not lifted correctly. Always lift with your legs, not your back, and keep the gear close to your body.
Wear gloves or wrist supports if needed, and be mindful of sharp edges or fragile components. A quick safety check before starting can prevent accidents that ruin your night or land you in the ER.
professional DJ gear protective cases
As an affiliate, we earn on qualifying purchases.
As an affiliate, we earn on qualifying purchases.
Follow a Logical Breakdown Order to Save Time
Breaking down systematically makes the process faster and less stressful. Here’s a step-by-step example:
- Disconnect and coil cables, label them with Velcro straps or color-coded tape.
- Remove microphones and stands, fold stands carefully to avoid bending or breaking.
- Pack controllers and mixers last, since they’re usually the most delicate.
- Wrap speakers in blankets or bubble wrap if they’re not going straight into flight cases.
- Secure everything in padded cases or gig bags, making sure nothing rattles or shifts.
This order minimizes fumbling and ensures fragile items are protected throughout the process. For example, disconnecting cables first prevents tripping or accidental yanks when moving gear.
cable labeling tags for audio equipment
As an affiliate, we earn on qualifying purchases.
As an affiliate, we earn on qualifying purchases.
Use the Right Packing Gear to Keep Equipment Safe
Investing in quality cases, bags, and padding isn’t just about protection—it’s about preserving your gear’s longevity and ensuring quick setup in future gigs. For example, a sturdy flight case like the Odyssey FZ12 not only shields your mixer from impacts but also makes stacking and transporting easier, reducing the risk of dropping or damaging sensitive equipment. This tradeoff of initial investment versus long-term protection pays off by preventing costly repairs or replacements.
Choosing the right packing gear involves understanding the tradeoffs: high-quality cases cost more upfront but offer superior protection and durability, saving money over time. Cheaper alternatives may save initial costs but can lead to frequent replacements or damage, which is more expensive in the long run. Proper padding, like foam inserts or bubble wrap, acts as a buffer against shocks, vibrations, and impacts that can cause internal damage—especially critical during transit over uneven surfaces or in crowded venues. Additionally, organization is key—keeping accessories in labeled containers prevents tangled cords and misplaced items, reducing setup time and risk of damage. For instance, a dedicated cable organizer like the Gearlux Cable Wrap not only keeps cords tangle-free but also preserves their lifespan by avoiding unnecessary bending or twisting.
padded equipment cases for DJ gear
As an affiliate, we earn on qualifying purchases.
As an affiliate, we earn on qualifying purchases.
Label Cables and Gear for Faster Reassembly
Labeling your cables and gear isn’t just about saving time; it’s about reducing the mental load during reassembly. When you disconnect multiple similar cables, confusion can lead to incorrect connections, which might cause sound issues or even damage your equipment. By marking each cable with color-coded tape, a Sharpie, or pre-printed labels—such as “Vocal Mic” or “Subwoofer”—you create a clear map of your setup. This clarity minimizes guesswork and streamlines your setup process, especially in low-light or hurried situations.
Taking a minute to label now can save you at least 10 minutes of frantic searching or trial-and-error during setup. Plus, it reduces the risk of plugging cables into the wrong ports, which can cause electrical damage or poor sound quality. The small investment in labels pays off by making your reassembly faster, more accurate, and less stressful, ultimately extending the lifespan of your gear by preventing improper connections. Furthermore, clear labels help avoid accidental damage caused by mismatched connections, which can lead to shorts or component failures. Over time, this organized approach reduces wear and tear on your equipment, ensuring it remains functional and reliable for many gigs to come.
As an affiliate, we earn on qualifying purchases.
Maintain a Clean Workspace and Final Check
Cleaning up the venue isn’t just about aesthetics—it’s a reflection of your professionalism and respect for the space. A tidy workspace reduces trip hazards and makes the teardown process more efficient. Sweeping or vacuuming the area removes dust, debris, and small objects that could interfere with your gear or cause damage over time. Double-checking that you’ve collected all components—such as mic stands, cables, or lighting fixtures—prevents delays and last-minute scrambling.
Performing a quick visual and tactile scan helps identify any damage or missing items that could impact your next gig. Photographing your setup at the end creates a visual reference that can be invaluable if you need to troubleshoot or replicate your setup later. This is especially useful if your configuration involves complex lighting or multi-layered gear, as it provides a clear record of what went where, reducing setup time and errors in future performances. Additionally, a clean and organized space reduces the risk of losing small but essential items, saving you time and frustration on your next gig. Developing a habit of thorough final checks ensures nothing is overlooked, which can prevent last-minute surprises and help maintain your professional reputation.
Secure Gear for Safe Transport and Storage
Securing your gear properly during transport isn’t just about preventing damage; it’s about ensuring safety for you and others. Using padded cases, foam inserts, and straps or bungee cords keeps your equipment stationary and cushioned against bumps. For example, a portable cart like the RocknRoller Multi Cart allows you to move multiple heavy cases simultaneously, reducing strain on your back and decreasing the risk of dropping gear during loading and unloading. Properly secured gear minimizes the chance of items shifting or falling, which could cause damage or injury. It’s a tradeoff—taking the extra time to secure everything properly may seem tedious, but it significantly reduces the risk of costly repairs, replacements, or accidents. Protecting your gear from environmental hazards like dust, moisture, and temperature fluctuations is equally important. Using covers or climate-controlled storage prevents long-term deterioration, especially for high-end equipment like Pioneer DJ controllers or QSC speakers. Investing in these protective measures is essential for maintaining your gear’s performance and lifespan, ultimately saving money and ensuring your equipment is ready for every gig.
Leverage Technology to Streamline the Process
Using digital tools like inventory management apps (e.g., GearTrack or Sortly) transforms chaos into clarity by keeping an up-to-date record of your gear. These apps allow you to track what you have, where it’s stored, and what needs maintenance or replacement. Creating and following checklists on your phone or tablet ensures you don’t forget essential steps or equipment, especially during hurried tear-downs. Some advanced DJs even use remote cameras or sensors that monitor gear status during the teardown process, alerting you to issues like loose connections or overheating—saving you time and preventing damage.
Wireless cables and quick-connect systems are game-changers. Replacing traditional XLR runs with wireless transmitters like the Sennheiser AVX system reduces cable clutter, speeds up setup and teardown, and minimizes trip hazards. While these systems involve a higher initial cost, the time saved and the safety benefits often outweigh the expense, especially in busy venues or tight spaces. Embracing technology not only makes your teardown more efficient but also helps you maintain a professional image and extend the lifespan of your equipment. The tradeoff here involves an investment in learning new systems and possibly higher upfront costs, but these are offset by increased reliability, faster setups, and reduced wear and tear on your gear, ultimately enhancing your performance and reputation.
Frequently Asked Questions
How do I organize cables for quick teardown?
Use Velcro straps or cable ties to bundle each cable, label each with tape or a marker, and store them in dedicated containers or pouches. This keeps everything tangle-free and easy to identify.What’s the best way to speed up my teardown process?
Create a checklist, work systematically in the right order, and prep all tools and bags before starting. Practice makes perfect—repeating the process will make it faster every time.How can I prevent gear damage during transport?
Use padded cases, wrap fragile items with bubble wrap or foam, and secure everything with straps or bungee cords. This minimizes movement and impact during transit.What tools make teardown easier?
Cable organizers, quick-release clamps, portable carts, and labeling tools like a Sharpie or pre-printed labels help you work faster and more efficiently.What should I do if gear gets damaged during teardown?
Document the damage with photos, report it to the venue or your insurance, and repair or replace the item promptly. Prevention is better—regular maintenance and careful handling go a long way.Conclusion
Mastering the art of teardown turns a stressful chore into a quick, safe, and efficient routine. Proper planning, organization, and safety reduce errors and protect your investment in gear. The next time you finish a gig, think of teardown as your chance to wrap up professionally—setting the stage for an even smoother setup tomorrow.
Remember: a little prep now saves hours of headaches later. Your gear, your back, and your future gigs will thank you.
Fall Picks
fall essentials
As an affiliate, we earn on qualifying purchases.